Hacking a cable into the Microsoft Sculpt wireless keyboard
I brought a Microsoft Sculpt Keyboard from Ebay but unfortunately it came with no wireless dongle. This rendered the keyboard pretty useless. The dongles are all unique to the keyboard. This left me with two options. Build a keyboard sniffer that can read any Microsoft wireless keyboard or hack a wire into the back. I decided the latter made me feel more comfortable.
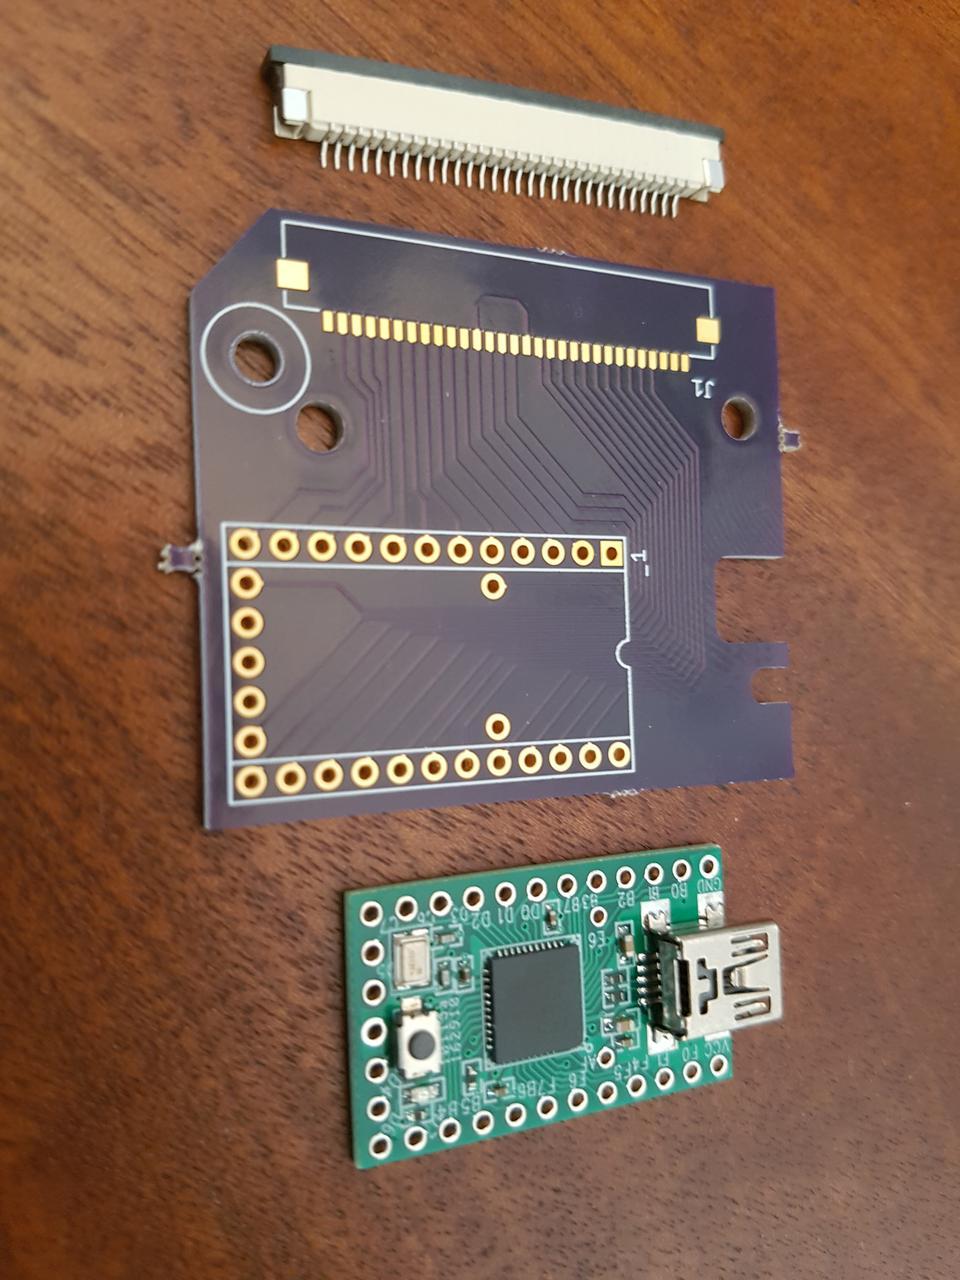
Luckily somebody was way ahead of me with both of these options so I decided to go with the slightly more secure wired version. Blttll on github had created a US layout version for Microsoft Sculpt keyboards. and kindlly shared not only the code but also to CAD file to make a board.
I sent the board designs off to oshpark and within a couple of weeks had the boards and the Teensy and connector back and was ready to go.
Hooking it all up I plugged it in and programmed the Teensy with the code and let it reboot. It works! I'm always surprised when these things do just work. As I tapped more keys more worked and where in the right place. I really thought I was in for a long session of remapping all the keys for the UK layout. Turns out there where only two keys missing. The and the #. So it was just a case of working out where on the matrix those keys live and updating the code to reflect that.
Most keyboards have a matrix system that has two grids of wires, one horizontal and one vertical. When you press a key it makes a connection between two of the lines, one in each direction. That way you don't need to have a wire for each key and the controller in the keyboard just scans all the wires two at a time and listens for things that are connected. It's slightly more complex I than that I think but it's the basic idea.
I was building this all at the hackspace. both because they have some good soldering irons but also because there is always somebody about to help. I worked out that the tmk code that I was using allowed you to put the keyboard into various debugging modes. These would then send various outputs about the keys you are pressing to the HID driver that you can then look at with a hid-listen. program. So off I went and quickly found out that the keys where wired up and I could work out where on the matrix they are. All I had to do then was add them to the three look up tables in the software that define the keyboard. This is where I came a little unstuck, I just could not get my head round how they all related and on my first go manage to remap the right shift to something odd and that's about it. Luckily help was on hand and John happend to ask what I was up to and after explaing where I was stuck pointed me to the right place to put the right numbers. We compiled it one more time and progammed the keyboard again and Yeh! we have a working # key. Then following the same pattern we where able to get the key working and it's all great! Thank you John.
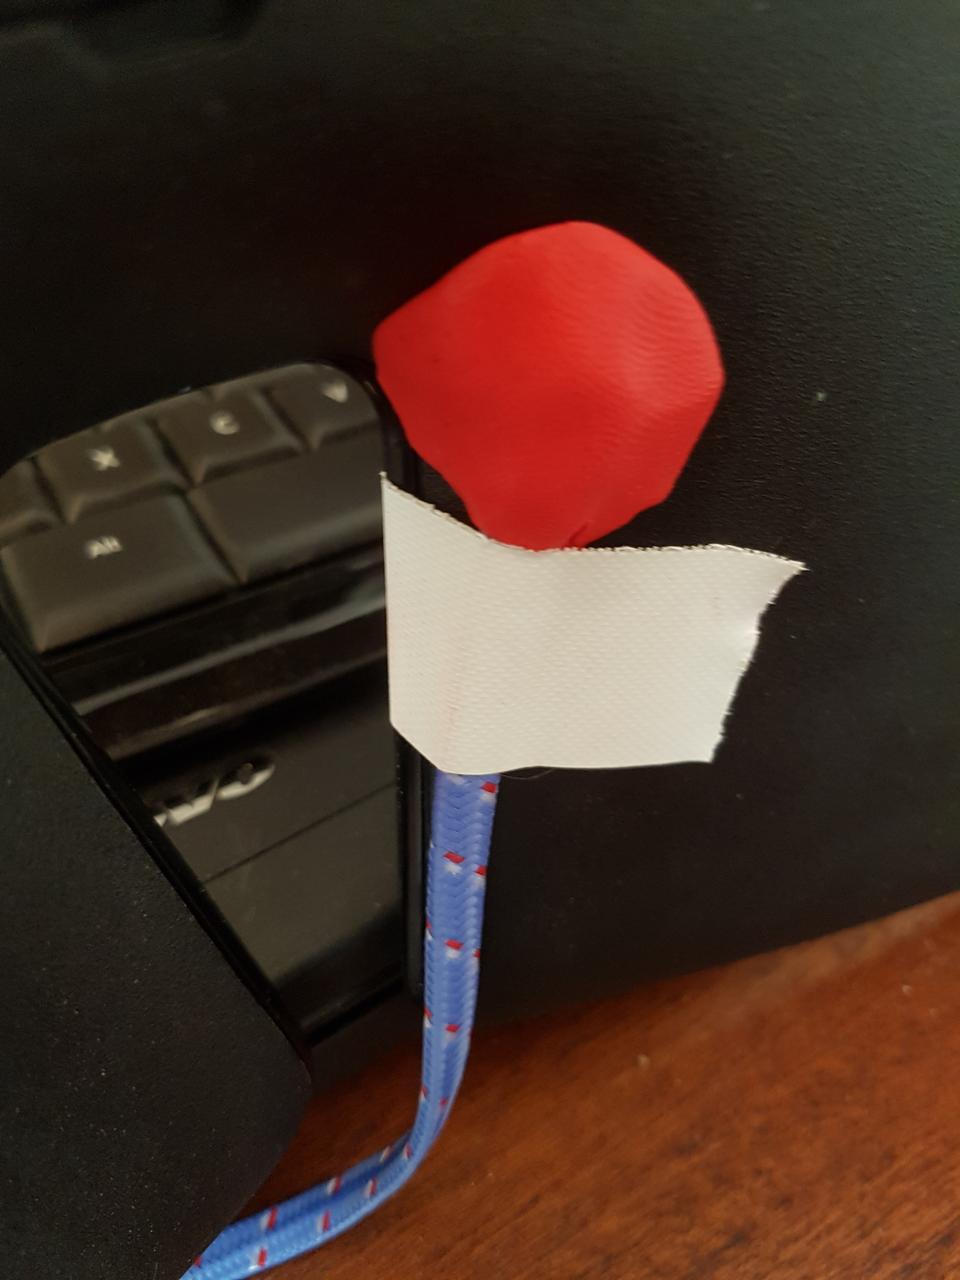
Then it was just a case of making some small modifications to the case with a Dremmel to fit the new board in, drilling a hole in the back to let the cable out and it's all working fine. Just waiting for some sugru to set to hold the cable in place.
I am really happy I could save this one from the bin and in fact I'm using the keyboard right now and it's great although it's highlihgting how bad my typing is as I'm always reaching out to the wrong keys and now there is a gap in the middle I can't do that. I have sent a pull request on github to see if I can get my changes added upstream but I hope at least other might see that if they are hoping to do the same.
Comments
Comments powered by Disqus